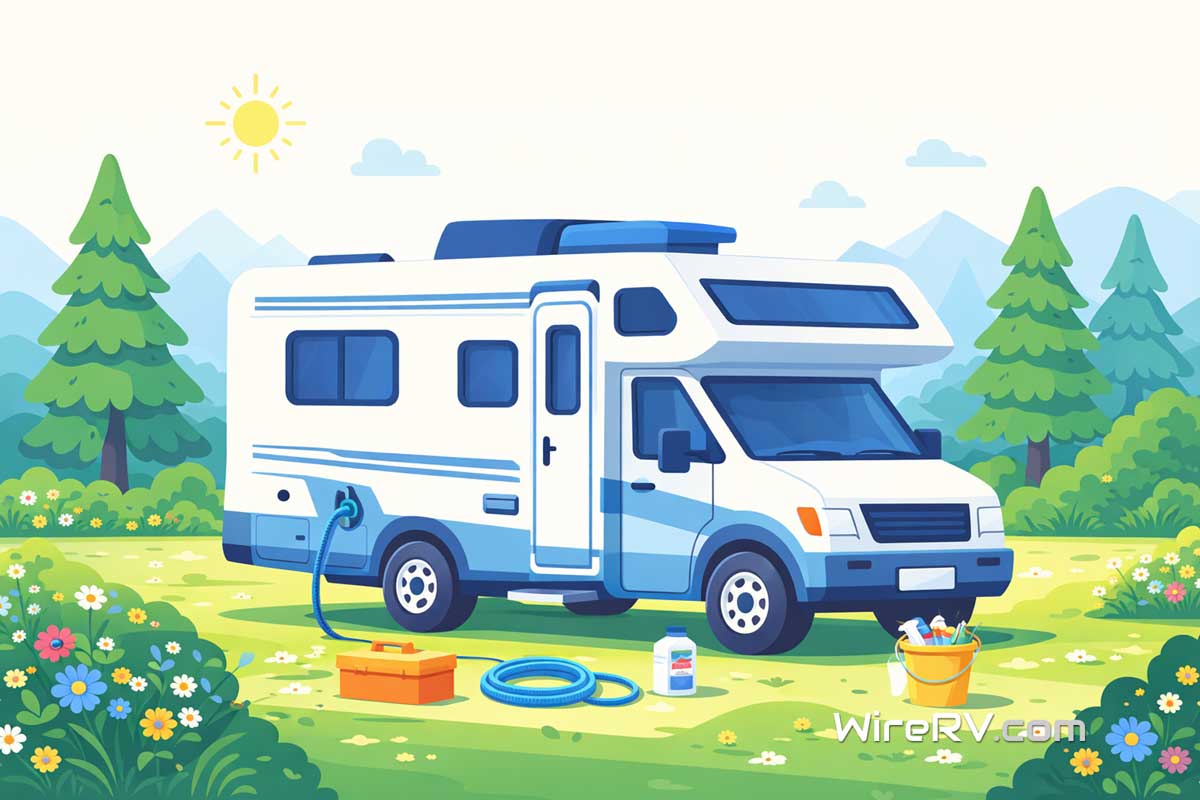
What Does RV Dewinterizing Checklist Mean? 🚐
After months in storage, your RV needs a few key steps before it is ready for travel again. That’s where an RV dewinterizing checklist comes in. RV owners call this process dewinterizing, which simply means reversing the winter storage process: removing antifreeze from the plumbing system, reconnecting components that were bypassed, inspecting major systems, and making sure everything is safe to use before your first trip of the season.
Taking time to carefully bring your RV out of storage helps prevent leaks, appliance problems, and unexpected repairs during your first trip of the season.
If you are new to RV ownership, don’t worry because most of these checks are simple and only take a little time. 👍

Before You Start: Supplies You’ll Need 🧰 with Your RV Dewinterizing Checklist
Most RV dewinterizing tasks require only a few basic tools and supplies. Having them ready before you begin makes the process much easier.
Common items include:
- Drinking water hose
- Water pressure regulator
- Screwdriver or small socket set
- Paper towels or rags
- RV-safe tank sanitizer or household bleach
- Flashlight for inspections
These simple supplies cover the majority of what you’ll need to get your RV ready for spring travel.
Step‑by‑Step RV Dewinterizing Checklist 📝
Use the following steps as you bring your RV out of winter storage. Every RV is slightly different, but this process covers the core systems most RV owners need to check each spring.
Reconnect and Check the RV Battery 🔋
If the battery was removed or disconnected during winter storage, reinstall it and make sure it is fully charged. Check the terminals for corrosion or loose connections and clean them if needed.
A weak battery is one of the most common issues people encounter when starting their RV for the first time each season.
Inspect the Roof and Exterior Seals 🔍
Winter weather can cause sealant to crack or separate. Indeed, inspect areas around:
- Roof seams
- Vents
- Skylights
- Antennas
- Ladder mounts
Catching seal issues early helps prevent water damage, which can be one of the most expensive RV repairs.
Check Tire Condition and Pressure 🛞
RV tires often lose pressure during storage. Use a tire gauge to bring them back to the recommended PSI listed by the manufacturer.
Also inspect the sidewalls for:
- Cracks
- Bulging
- Uneven wear
Even tires with good tread can become unsafe if the rubber begins to deteriorate.
Flush Antifreeze from the Water Lines 💧
During winterization, RV antifreeze is added to the plumbing system to prevent freezing. Now it needs to be flushed out.
Connect your RV to a clean drinking water source and run each faucet until the pink antifreeze runs clear.
Be sure to run both hot and cold water for:
- Bathroom sink
- Kitchen sink
- Shower
- Outdoor shower (if equipped)
Reconnect the Water Heater ♨️
Many RVs use a water heater bypass valve during winterization. Before operating the heater again, return the valves to their normal position so the tank fills properly.
Once water is flowing through the system without air or antifreeze, the water heater can safely be turned on.
Sanitize the Fresh Water Tank 🧼
Some RV owners choose to sanitize the fresh water system at the start of the season. This helps remove bacteria that may have developed while the RV was in storage.
Sanitizing the system once per year is a good preventative maintenance habit.
Check for Plumbing Leaks 🚿
With the system pressurized, inspect plumbing connections throughout the RV.
Look under:
- Sinks
- Near the water heater
- Around the water pump
Watch for drips, damp wood, or loose fittings that may have shifted during winter storage.
Test the Propane System 🔥
Turn on the propane supply and briefly test appliances such as:
- The stove
- The furnace
- The water heater
If you smell propane or notice unusual flames, turn the system off and investigate before continuing.
Start the Refrigerator and Air Conditioner ❄️
Before your first trip, run both appliances to confirm they are operating normally. It is better to discover problems at home rather than at the campground.
Clean and Air Out the RV Interior 🪟
After months of storage, the interior may feel stale. Open windows and roof vents to allow fresh air to circulate.
Wipe down surfaces, check cabinets, and look for any signs of moisture or pests that may have appeared during storage.
Wiping down surfaces and opening windows helps freshen the RV after months in storage. It’s also a good time to wash your hands regularly while cleaning, following CDC handwashing guidelines.
Cleaning the RV interior is also a great opportunity to reorganize cabinets and storage areas. If you want to make better use of your space, check out our RV kitchen storage ideas for simple ways to keep your RV organized.
Common Problems After Dewinterizing ⚠️
Occasionally RV owners notice small issues when bringing their RV back into service.
Some common ones include:
- A water pump that runs continuously
- Low water pressure
- A refrigerator that isn’t cooling properly
- Small leaks in plumbing fittings
Most of these issues are easy to fix if caught early, which is why a careful spring inspection is important.
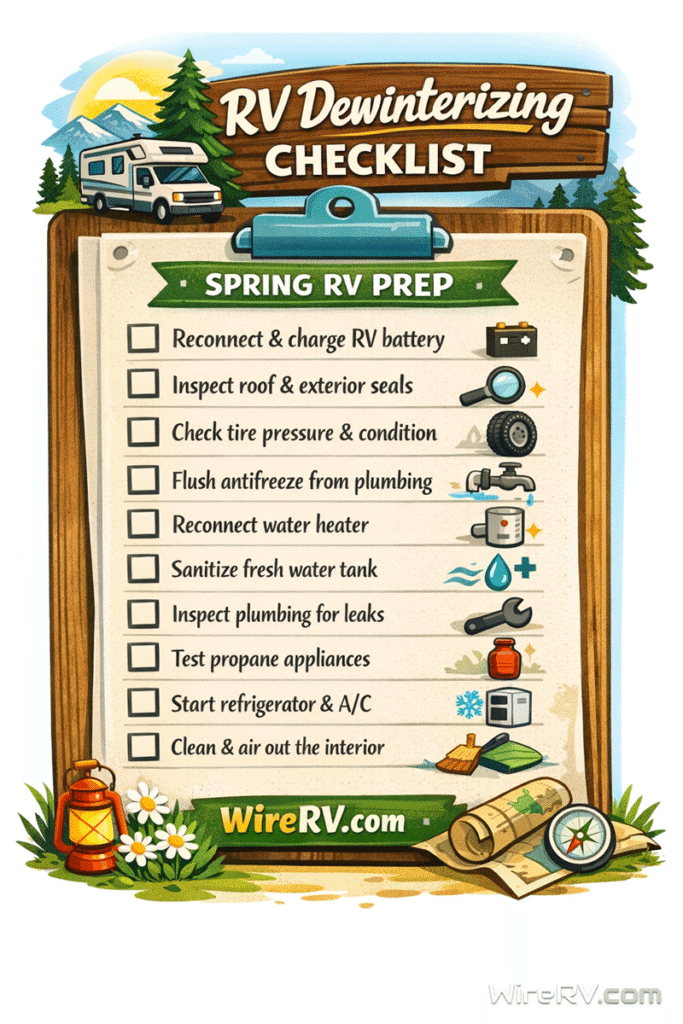
Printable RV Dewinterizing Checklist 📋
If you prefer something you can bring outside with you, a printable RV dewinterizing checklist can make the process easier to follow.
We’ll provide a simple printable version of this checklist so you can check off each step while preparing your RV for the season.
Download the printable version:
⬇️ Download the Printable RV Dewinterizing Checklist (PNG)
FAQ: RV Dewinterizing Checklist ❓
How long does it take to dewinterize an RV?
For most RV owners, the process takes 30 minutes to two hours, depending on how detailed the inspection is and the size of the RV.
Do you need city water to dewinterize an RV?
City water makes flushing antifreeze easier, but you can also use the RV’s fresh water tank and pump if needed.
Do you need to sanitize the RV water system every spring?
Sanitizing isn’t strictly required every year, but it is a recommended maintenance practice, especially if the RV has been unused for several months.
Getting Your RV Ready for the Season with an RV Dewinterizing Checklist 🏁
Bringing your RV out of storage doesn’t have to be complicated. Following a careful RV dewinterizing checklist helps make sure your plumbing, appliances, and major systems are ready for the road again.
Taking a little time to inspect your RV in early spring can prevent leaks, appliance problems, and unexpected repairs later in the season. Once everything is checked and running properly, your RV will be ready for its first trip of the year.
If you’d like something easy to follow while working through the process, be sure to download our printable RV dewinterizing checklist and keep it with your RV maintenance notes.
Leave a Reply